CHRISTMAS TREE DECORATIONS
1. The More Decorations the Better: There’s no such thing as too many decorations on your tree. If your ornaments are carefully selected and evenly spaced, the more decorated the better looking the tree.
2. Silk Flowers: Silk flowers are a great way to add color and beauty to your tree. You can choose different colors, or make them all white for a beautiful snowy effect.
3. Metallic Spray: Paint pine cones, leaves and seedpods with metallic spray. Then you can evenly space them on your tree for a great new look.
4. Miniature Wreaths: You can find all kinds of miniature wreaths at craft stores. Add greenery, ribbons or berries with a glue gun, and tie a ribbon for hanging, and you have a great home-made tree/wall decorations.
5. Ribbon Streamers: Instead of garland, try using ribbon streamers. All you do is attach Christmas colored ribbon or raffia to the top of the tree, then wind them down and around the tree until you get to the bottom.
Showing posts with label Crafts. Show all posts
Showing posts with label Crafts. Show all posts
Wednesday, December 2, 2009
Tuesday, November 18, 2008
A fun project for kids: Make your own Christmas ornaments
Instructions: Paste each picture onto cardboard and cut out along the dotted lines (always use safety scissors so you don't cut yourself). Color with plain or glitter crayons, with paint or felt-tip markers - whatever you've got. Punch out the black dots and string with bright ribbon, then hang them on the tree, over the mantle of the firepace if you have one, in your room, or wherever your folks say it's okay to hang them. These can also be glued to wood or cloth. Parents & guardians: younger children may require some help with this.


Click on thumbnails for larger images.
Thanks to Graylady.
Saturday, November 8, 2008
Money origami: Make a gift box from two bills
Just the size for a...ring...maybe? Or perhaps another bill tucked inside it, before placing it in a Christmas sock?

Saturday, December 15, 2007
How to make a cranberry-popcorn garland
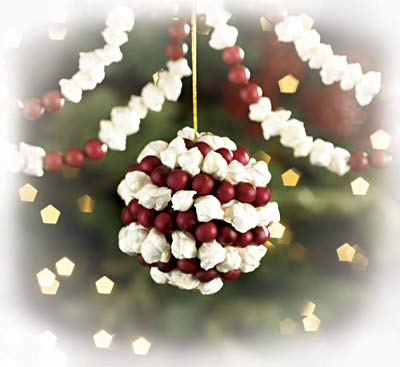 Yes, it's true that garland is relatively inexpensive, and can be purchased almost anywhere. It wasn't so in days of yore, and rural families most often simply made their own. Thematically, what the garland was made of depended on what was available, but most commonly popcorn was used, or ribbon with or without baubles and bows stitched onto it.
Want to try to make your own? If so, make it an experience - something the family can do together, that will make for fond memories. Put on Christmas music, or one of your favorite movies. Serve cocoa or hot cider and Christmas cookies.
MATERIALS:
- Popcorn: No salt and no butter, if possible. After popping the popcorn, let it sit out for a day to get stale; fresh popcorn crumbles.
- Fresh cranberries
- Heavyweight sowing needle. Use good judgement in how old your child needs to be to handle a sewing needle, and supervise them well. For a very young child, you can set them to the task of alternately handing you cranberries and popcorn.
- Heavyweight sewing thread. Waxed dental floss works great, because it is less-prone to breakage, and the addition of the wax makes it easier to slide the cranberries along.
Lay out long lengths of thread. Tie a knot at one end, and thread the other end through the needle. The individual segments can be tied together when you're finished, but be sure to leave a couple inches of thread at the end of each segment.
Push the needle through the cranberry and slide it down the length of the thread to the knotted end. Then do the same with a piece of popcorn. Alternate popcorn and cranberries until the segment is finished.
Lastly, tie the segments together, and hang the garland.
After Christmas, send the kids out with the garland to decorate any shrubs or trees around your residence. A small child will get a lot of pleasure out of seeing the birds dine on the garland he's hung out.
Wednesday, December 12, 2007
A Great Grinchy Trick
A friend turned me on to this gag-gift stocking-stuffer idea. It's very simple, yet kind of funny. Kids are certain to get a kick out of it.
What you need to do:

What you need to do:
- Buy a bag or three of M&Ms, plain or peanut (how many you buy depends on how many gag gifts you wish to make).
- Pick out the green ones, and set them aside. Eat the others. :)
- Get as many small bags as gifts you wish to make. Use Ziploc baggies, or if you want, buy some fancy little bags.
- Apportion the green M&Ms out in the baggies.
- Save the image file below to your computer.
- Print one image per gift, and cut them out neatly. Fold and insert in bags.
- Stuff the stockings with your homemade gag gifts.
- You may also add some candy sprinkles, or edible sparkles, to get a more festive effect.
Card designed by R. Dean Brock. For personal use only.
*NOTE: you may need to set the printing parameters manually on your printer, as not every graphics-viewing utility will understand that this image is set to print at 4 x 2.7 inches. Adobe Photoshop and most other sophisticated photo-editing software will print it at the correct size, automatically.
Alternatively, you may print it at any size your printer dialog can manage because the resolution is high enough in the image that it will look quite bright and crisp all the way up to an 8.5' x 11' print.
Saturday, December 8, 2007
"Make a Flake," online
Here's a fun little online flash utility, for making a digital snowflake. The program folds it for you, and you cut it out with digital scissors. It may take a few trys to get the hang of it, but "undo" and "start over" buttons are provided. Kids will really enjoy this.
http://snowflakes.lookandfeel.com/
After creating and saving your flake, you have the option of saving it in .JPG format, or as an .EPS file (opens in Adobe Photoshop and Illustrator), for further editing. You may also e-mail it to a friend directly from the website.
Don't forget to view the gallery! There are literally thousands of snowflakes there, and they are all downloadable.
Here are two I just created (click on thumbnails to enlarge):


Friday, November 30, 2007
Los Ojos del Dios...
 ...means "The Eyes of God," not referring to the literal eyes of a deity, in this case, but to an artform heralding from Mexico. "God's Eyes" are kind of hanging decoration that can be very simple in nature, or extremely complex.
A good project for a kid is making a God's Eye Christmas ornament with a couple popsicle sticks, using yarn in the colors of Christmas (or whatever colors you like).
Make a God's Eye Ornament
Subscribe to:
Comments (Atom)